Search Here

Thousands of office workers experience continued discomfort because they never learnt about proper adjustment techniques, despite companies investing in ergonomic chairs. A study found that while 98% of office chairs had seat height adjustability, only 41% of users had ever adjusted it, indicating most leave factory settings unchanged and miss ergonomic benefits.
This guide will walk you through the systematic process of configuring your chair for optimal comfort and support. You'll learn specific adjustment sequences, proper measurements, and how each setting affects your posture throughout the workday.
Chair setup follows a deliberate sequence, not random adjustments. Each step builds logically on the last to optimize ergonomics and comfort.
Your seat height forms the foundation of an optimal workstation setup, influencing posture, comfort, and long-term health. Adjust it so your feet rest flat on the floor (or a footrest), with thighs parallel to the ground and hips slightly higher than knees. This creates 90-degree angles at your hips and knees, minimizing lower back strain, improving spinal alignment, and enhancing blood circulation to prevent fatigue and conditions like sciatica.
To measure accurately, stand and note the distance from the floor to the crease behind your knee—set your seat 1-2 inches lower. If your desk is too high, forcing an elevated chair that compromises leg position, prioritize arm alignment for typing: elbows at 90 degrees, forearms parallel to the floor. Use a footrest to restore proper angles without raising the entire chair. Ergonomic training on workstation adjustments significantly reduced neck pain by 42.2% among computer workers, alongside improvements in habits like chair height and posture. Test new positions briefly for comfort, then incorporate frequent standing and stretching to sustain benefits.
After setting the proper seat height, adjust the seat depth to fully support your thighs without compressing the back of your knees or restricting circulation. Aim for 2-4 finger widths (about 2-5 cm) of clearance between the seat's front edge and the popliteal crease. This prevents pressure on nerves and blood vessels while ensuring your lower back fully contacts the lumbar support for optimal spinal alignment.
Many adjustable ergonomic chair models feature sliding seat pans to suit varying leg lengths and body types. Shorter users often benefit from a shallower depth to avoid perching forward, while taller individuals require deeper support for comprehensive thigh coverage. Test by sitting fully back; if your knees overhang uncomfortably or circulation feels pinched, fine-tune accordingly.
Your lower back requires targeted support to maintain its natural curve during extended sitting. Proper lumbar adjustment can reduce disc pressure by 25% compared to unsupported seating.
Stand against a wall with your heels, buttocks, and shoulders touching it. Slide your hand between your lower back and the wall—this space represents your lumbar curve that needs support. Most people's curves fall between 6 and 9 inches above the seat surface, though individual variation is significant.
Adjust your ergonomic chair's lumbar support both vertically and horizontally. You should feel gentle, even pressure across your lower back without any hard pressure points. The support should feel like a helping hand maintaining your spine's natural position, not forcing an exaggerated arch.
After adjusting your chair, sit in the optimized position for 10-15 minutes while performing regular work tasks to truly assess its effectiveness. Proper lumbar support should keep your natural spinal curve intact, preventing slouching forward, excessive fidgeting, or the urge to frequently shift positions due to discomfort. If you notice yourself pulling away from the backrest, developing pressure points on your thighs or back, or struggling to maintain contact with the lumbar area, make incremental tweaks—such as reducing seat depth by 1-2 cm, raising or lowering the height slightly, or repositioning the lumbar pad higher or firmer—until you achieve stable, pain-free posture that supports hours of productivity without fatigue.
Properly adjusted armrests play a key role in reducing load on the neck, shoulders, and upper back by supporting the weight of the arms and encouraging a more relaxed posture. Well-designed armrests can significantly lower muscle activity in the trapezius and shoulder region, helping to decrease discomfort and fatigue over long work periods.
Your armrests should support your arms with shoulders relaxed and elbows bent at 90-100 degrees. When typing, your forearms should be parallel to the floor or angled slightly downward. Common mistakes include setting armrests too high, causing shoulder elevation, or too low, leading to slouching.
The following measurements help achieve proper armrest positioning:
Height: 7-11 inches above the seat surface for most users
Width: Allow natural arm position without forcing elbows away from your body
Depth: Position armrests so they don't interfere with desk access while providing support during typing breaks
Armrests should be positioned so they can slide slightly under your desk or align comfortably with its surface, allowing you to maintain a neutral, relaxed posture while working. Your armrests should enable this without forcing shoulder elevation or outward elbow flare. If they prevent pulling close to your keyboard, opt for models with forward/backward adjustment or removable caps for customized clearance. In warm climates with frequent bare-arm contact, choose padded or breathable surfaces to prevent perspiration-related discomfort, skin irritation, stickiness, and heat buildup during long sessions.
The relationship between your backrest angle and tilt tension affects both comfort and productivity. A properly adjusted backrest supports the natural curve of your lower back, helping distribute weight evenly and reduce strain during extended sitting. Adding a supplementary backrest to a standard chair reduces peak pressure on the back by 35% and average pressure by 20%, enhancing spinal support.
For focused computer work, set your backrest at 95-110 degrees from the seat. This slight recline maintains alertness while reducing lower back stress. During phone calls or thinking tasks, a deeper recline of up to 120 degrees promotes relaxation without compromising support.
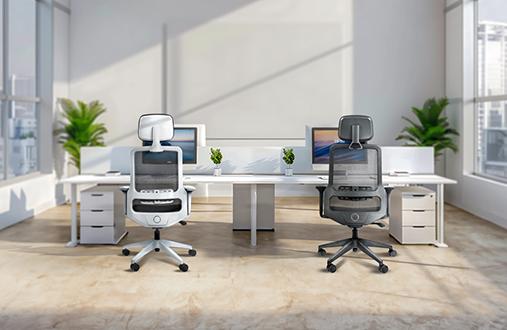
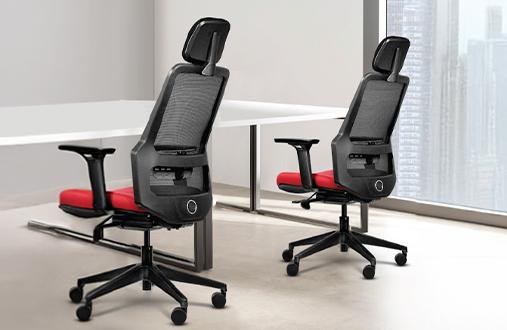
Adjust tilt tension so the chair supports your weight without requiring effort to recline. You should be able to lean back smoothly and return to an upright position without fighting the mechanism. Quality ergonomic chair designs like those from Wipro's Task Zone seating solutions offer sophisticated tilt mechanisms that maintain lumbar contact throughout the recline range.
Most ergonomic chairs provide multiple tilt lock positions tailored to various tasks, allowing precise control over recline angles.
Secure the backrest in a fully upright position for focused, detailed computer work requiring stability and forward posture.
For less intensive activities like reading or brainstorming, release the tilt lock to enable dynamic, controlled movement.
This strategic variation discourages prolonged static postures, reduces muscle fatigue in the back and core, and encourages healthy, frequent position changes throughout your workday to maintain circulation and spinal health.
Once primary adjustments are complete, several finishing touches optimize your setup for long-term comfort.
Sit in your fully adjusted chair for at least 30 minutes during typical work activities. Pay attention to these comfort indicators:
No pressure points on thighs, back, or arms
Natural breathing without chest restriction
Easy reach to keyboard and mouse without stretching
Clear monitor view without neck strain
Stable foot position without dangling or pressure
Small refinements often make significant differences. A half-inch adjustment in seat height or slight armrest repositioning can transform an uncomfortable setup into supportive seating.
Your ideal chair setup may vary between tasks. Computer work requires a more upright position with active lumbar support, while reading or phone calls benefit from increased recline. Learn your chair's quick-adjustment features to transition smoothly between positions without disrupting workflow. In space-constrained home offices, common in urban areas, chairs with intuitive controls allow rapid adjustments when sharing workspace with family members or switching between work and personal activities.
Creating the perfect ergonomic chair setup requires patience and systematic adjustment. Start with seat height, progress through depth and lumbar settings, fine-tune armrests, and finish with backrest angles that support your work style. Proper office ergonomics can reduce discomfort over time with consistent use and movement. Document your ideal settings to quickly restore them after others use your chair or after cleaning.